Generally, using a computer can save a lot of time for most tasks. In extreme cases, all tasks can be automated. In order to do this, you don't have to study a lot. It's enough to find out what the efficient method is for each task. In this session, I'm going to show you a very efficient way to capture a computer screen. This will be especially useful when you need several screenshots including various editing tasks.

To capture the screen efficiently, you need to install a program. It's called "PicPick". This program can be used for free. Moreover, it has many features. It is also easy to use, so even beginners can use it easily.

Please download and install the screen capture program from the PicPick site. While installing, I'll briefly introduce the main features of PicPick. For screen capture, there are various ways to proceed. They can all be useful depending on the situation, but personally, I use the area selection method a lot. Besides the capture function, you can also easily edit the captured screen or add effects.

I ran the downloaded program. The first thing that catches your eye is the screen capture tool. You can take screenshots in various ways such as full screen, activated window, window control, auto scroll, area designation, fixed rectangle area, etc. If you click the function button, you can capture the computer screen immediately.
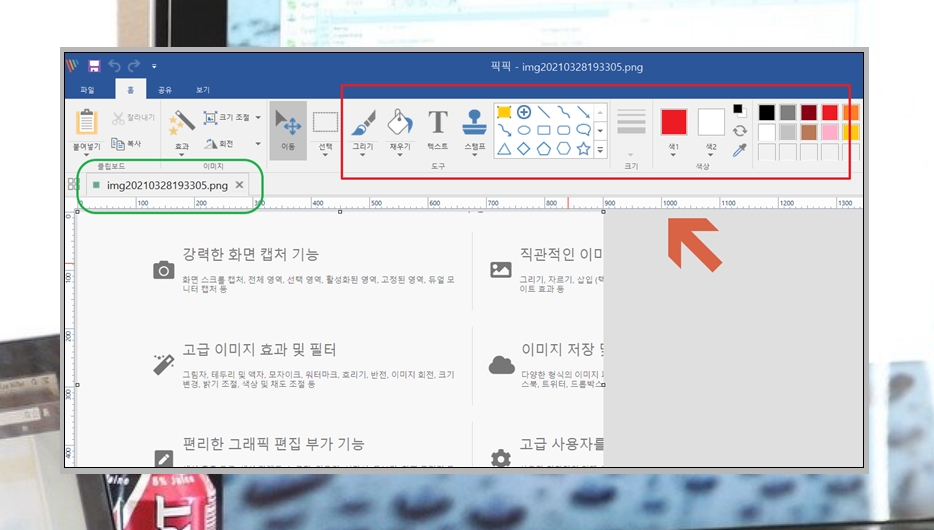
Once you capture, the computer screen is saved in the PicPick screen like this. In this state, you can edit it in various ways. If you look at the menu, you can add things like drawing, filling, text, and stamps. It's a tool that you can use as easily as Paint, which is built into your computer.

With PicPick, you can capture even if you use multiple monitors on one computer. You can also decide whether to include the mouse cursor. You can also save it to the clipboard.

When capturing the computer screen using the print screen button, you need to name each file. In the case of PicPick, you can automatically name the file. The process can be done in a way that the user has set, such as date, number, Unix timestamp, computer name, etc.

Finally, I'll explain the most important shortcuts. I mainly use the area designation method, which can capture only the necessary parts of the computer screen. Through the settings, you can assign this function to the "F1" key. Then, whenever you need a screenshot, you can easily start the task through the shortcut key. If you want to edit immediately, you can run the PicPick editor by pressing the "F2" key.

I'll use the area designation method by pressing the "F1" key. The way to use it is simple. In the state where the "F1" key is pressed once, click on the part you want to capture and drag it.
So far, I have told you various ways to easily capture the computer screen. This is the way I use when I actually need several screenshot screens. Through this, you should be able to significantly reduce your work time.
'PC관리' 카테고리의 다른 글
| 키보드 자판 오류 제대로 해결하기 (노트북 컴퓨터 포함) (0) | 2023.01.22 |
|---|---|
| 윈도우10 원격 데스크톱 따라하기 (간편 연결) (0) | 2021.04.07 |
| 컴퓨터 화면 캡처 따라하기 (작업시간 단축) (0) | 2021.03.28 |
| 컴퓨터로 라디오 듣기 따라하기, 다양한 채널 들어요 (0) | 2020.08.27 |
| 조립식 컴퓨터 견적사이트 똑똑하게 활용하기 (0) | 2020.08.18 |
| 컴퓨터 모니터 가격 추이 및 최저가 판매처 알아내기 (0) | 2020.08.14 |
| 컴퓨터 용량 확인 및 정리 쉽게 따라하기 (0) | 2020.07.29 |
| 홈페이지 제작방법 안내, 용도별 다양하게 만들기 (0) | 2020.06.10 |